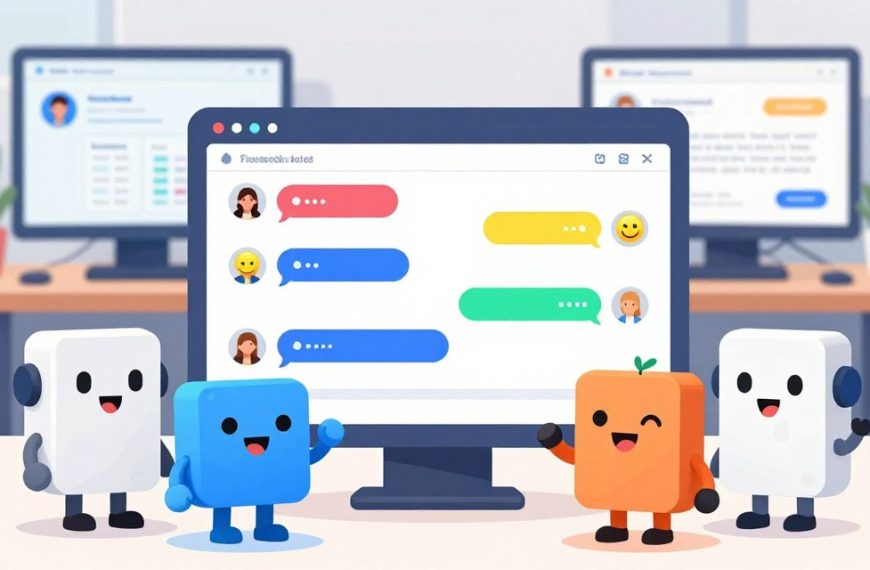
Chatbots are now key in business and tech. They help with customer service, give quick answers, and make things easier for users.
Creating these smart agents is easy with Python. It has many libraries like ChatterBot, NLTK, and OpenAI’s API. These handle the complex tasks of understanding language.
This guide shows you how to start from the basics to making a working chatbot. You’ll learn to pick the best tools and train your system with the right data.
We focus on doing things by hand, starting with simple rules. Then, we move on to making smart assistants that get the subtleties of language.
Making a Python chatbot from scratch teaches you important skills. It shows you how AI solves real-world issues.
Getting Started with Chatbots and Python
Before you start coding, it’s important to understand what a chatbot is and why Python is great for making them. Knowing this helps you choose the right tools and design your project for success.
Defining the Modern Chatbot
A chatbot is a smart program that talks to people like they’re real. It uses natural language and learning to get and answer questions.
Today, chatbots do more than just answer simple questions. They help with customer service, work as virtual assistants, and even teach. This shows how important they are in conversational AI.
The goal is to make talking to a chatbot feel natural and helpful. Whether it’s about the weather or fixing a problem, it should be easy and helpful.
Advantages of Using Python for Conversational AI
Python is the top choice for making chatbots for good reasons. Its easy-to-read code lets developers focus on the important stuff, not just the code itself. This makes building chatbots faster.
Python’s real strength is its huge library of tools. Libraries like NLTK and spaCy make natural language tasks easy. For more complex bots, TensorFlow and PyTorch offer great machine learning tools.
Also, Python has a big community of users. There are lots of tutorials, forums, and ready-made solutions. Learning Python also helps you work with APIs and data, skills that are useful in many areas.
Identifying Your Chatbot Type: Rule-Based or Intelligent
Choosing the type of chatbot you want is a big decision. It depends on how complex your project is and how much data you have.
Rule-Based Chatbots follow set rules. They use patterns and decision trees to answer questions. These are good for simple tasks, like answering FAQs or tracking orders.
Intelligent Chatbots use learning to answer questions. They can be further divided into:
- Retrieval-Based: These bots pick the best answer from a set of answers based on what the user asks. They don’t create new text.
- Generative: These models can create new, relevant answers. They are key to advanced conversational AI but need a lot of data and computing power.
The table below helps you decide which type is best for you:
| Chatbot Type | Core Mechanism | Best For | Development Complexity |
|---|---|---|---|
| Rule-Based | Pre-defined rules & decision trees | Structured tasks, FAQs, simple workflows | Low to Moderate |
| Intelligent (Retrieval) | ML to select from existing responses | Dynamic customer support, personalised menus | Moderate |
| Intelligent (Generative) | ML to generate novel responses | Open-ended dialogue, creative assistants | High |
Picking the right type early on helps avoid unnecessary complexity. It makes sure your project matches the user experience you want.
What You Need Before You Begin
Starting to build a chatbot is more than just importing libraries. You need to prepare well to avoid any trouble. This part covers two key areas: knowing Python and setting up your workspace.
Python Proficiency and Core Concepts
You don’t have to be an expert, but knowing Python basics is crucial. This guide assumes you’re using Python 3.7 or later. If you’re still learning, focus on these areas first.
Variables and Data Structures are the basics. You should know how to work with lists, dictionaries, tuples, and sets. These are used to handle conversation data and user inputs.
Control Flow with loops and if/else statements is key. You’ll use these to manage different user queries and conversation paths.
Functions help you organise your code. A good chatbot project uses functions for processing messages and generating responses.
Basic File Handling is important for loading data or saving logs. Knowing basic Object-Oriented Programming (OOP) can also be helpful, as many libraries use classes and objects.
Understanding these concepts will make working with NLP libraries easier. You’ll spend less time on syntax and more on creating smart dialogue.
Setting Up Your Development Workstation
Your development environment is your digital workshop. A good setup saves time and avoids common issues. Here’s what you need to prepare.
First, make sure Python is installed. Get the latest version from the official Python website. Check if it’s installed by typing python –version in a terminal.
Next, pick a code editor or IDE. Popular choices include:
- Visual Studio Code (VS Code): A lightweight editor with great Python support and many extensions.
- PyCharm: A powerful IDE for Python, with advanced debugging and project tools.
- Sublime Text or Atom: Fast, simple editors that some developers prefer.
Install your chosen editor and get to know its interface. You’ll also need to know how to use the terminal for running scripts and installing packages.
Finally, think about your project’s future needs. Knowing how APIs work will help when you connect your chatbot to external services. With your skills and tools ready, you’re set to choose the right Python chatbot library for your project.
Selecting Your Python Chatbot Library
Python has many chatbot libraries, each for different needs. Your choice affects how fast you can develop and how smart your chatbot will be. This guide helps you pick the right one.
A Comparative Look at Popular Libraries
Python has several top chatbot libraries. They range from easy to use to complex. Knowing what each does is key to making a good choice.
ChatterBot for Rapid Prototyping
ChatterBot is great for making chatbots quickly. It uses machine learning to learn from conversations. This makes it perfect for quick prototyping and simple bots.
But, ChatterBot’s upkeep has been hit-or-miss. For long-term use, you might need a more reliable option.
NLTK and spaCy for Natural Language Processing
NLTK and spaCy are top picks for NLP. NLTK is great for learning and research. It has tools for breaking down text and understanding language.
spaCy is better for real-world use. It’s fast and good at understanding text and finding important information.
Rasa for Complex, Contextual Assistants
Rasa is ideal for complex chatbots. It’s a full-stack solution for managing conversations. It’s perfect for enterprise-grade projects.
It lets you create custom chatbot experiences. This is great for customer service or personal assistants.
Transformers for State-of-the-Art Language Models
Transformers by Hugging Face gives access to advanced AI models. These models can make chatbots talk like humans. They’re great for cutting-edge performance.
You can also use APIs like OpenAI’s GPT. This is good if you want top-notch AI without hosting it yourself.
| Library | Primary Use Case | Key Features | Best For | Complexity |
|---|---|---|---|---|
| ChatterBot | Rapid Prototyping | Machine learning response generation, easy setup | Simple FAQ bots, learning experiments | Low |
| NLTK | NLP Education & Research | Extensive linguistic tools, corpus resources | Rule-based systems, academic projects | Medium to High |
| spaCy | Industrial NLP | Fast syntactic parsing, entity recognition | Production chatbots needing deep text analysis | Medium |
| Rasa | Contextual Assistants | Dialogue management, custom intent/entity definition | Customer service, complex multi-turn dialogues | High |
| Transformers | Advanced Language Models | Pre-trained models (GPT, BERT), state-of-the-art NLU | Open-domain conversation, high-fidelity text generation | Very High |
Matching Library Choice to Your Project Scope
Choosing the right tool for your project is crucial. It saves time and ensures your chatbot meets your needs. Here are some tips.
For a simple FAQ bot or a quick project, ChatterBot is the best. For custom text processing, use NLTK or spaCy.
For a chatbot that remembers and adapts, Rasa is the way to go. For the latest in AI, Transformers or a commercial API are your best bet.
The best library is not the most powerful one, but the one that most precisely matches your requirements for complexity, maintenance, and performance.
Your choice should consider both immediate needs and future growth.
Configuring the Python Environment for Chatbot Development
Before starting your chatbot project, setting up a stable Python environment is crucial. This step stops library version clashes and keeps your project’s needs organised. A well-set-up workspace is key for smooth development and deployment.
Creating an Isolated Virtual Environment
A virtual environment is like a private lab for your project. It lets you install specific package versions without messing with your system or other projects. This is a non-negotiable best practice for serious development.
Python has tools like venv and conda for this purpose. Choose the one that fits your workflow and needs best.
| Tool | Best For | Key Command |
|---|---|---|
| venv | Standard Python projects, simplicity, lightweight setup. | python -m venv my_chatbot_env |
| conda | Data science projects, managing non-Python binaries, complex dependencies. | conda create --name my_chatbot_env python=3.9 |
For most chatbot projects, venv is enough. To make and start a new environment named ‘chatbot_env’ on Windows, open your command line and type:
- Create:
python -m venv chatbot_env - Activate:
chatbot_env\Scripts\activate
On macOS or Linux, use: source chatbot_env/bin/activate. Your command prompt will show the environment name, proving you’re working in it.

Installing Essential Packages via Pip
With your environment ready, use pip to install libraries. The packages you need vary based on your project type. Here are some commands to get you ready for the tutorials.
Start with the basics for chatbot and natural language processing:
pip install chatterbot pytzpip install nltkpip install spacypip install rasa
For chatbots using advanced AI or machine learning, add these:
pip install openai tiktoken(for OpenAI API integration)pip install tensorflow keras(for custom neural network models)
After installing spacy, download a language model. For English, use python -m spacy download en_core_web_sm. For NLTK, download corpora in a Python script with nltk.download().
Your environment is now ready with the key tools. You have a clean, dedicated space for your chatbot project, free from system conflicts and equipped for building smart conversational agents.
How to Use Chatbot in Python: Building a Simple ChatterBot
Let’s build a simple chatbot from scratch. We’ll use the ChatterBot library, perfect for beginners. It’s easy to use and lets your chatbot learn from each chat. Unlike spaCy, ChatterBot is quick to set up and doesn’t need deep language skills.
| Step | Key Action | Primary Outcome |
|---|---|---|
| 1 | Installation & Project Setup | A clean Python environment with ChatterBot ready. |
| 2 | Object Initialisation | Core chatbot and trainer objects created in code. |
| 3 | Initial Training | The bot is populated with basic conversational knowledge. |
| 4 | Interaction Loop Coding | A live, running program that accepts user input. |
| 5 | Execution & Testing | A functional chatbot you can converse with. |
Step 1: Install ChatterBot and Create a New Project
First, make sure your virtual environment is active. Then, install ChatterBot with pip. Open your terminal and type the command.
pip install chatterbot chatterbot_corpusCreate a new directory for your project. Inside, make a Python file, like simple_bot.py. This file will hold all your code.
Step 2: Initialise the ChatBot and Trainer Objects
Open simple_bot.py in your editor. Import the ChatterBot modules. Then, create a ChatBot instance with a name.
from chatterbot import ChatBot
from chatterbot.trainers import ListTrainer

chatbot = ChatBot('SimpleBot')
Create a ListTrainer object linked to your chatbot. This trainer will use your initial conversation data.
trainer = ListTrainer(chatbot)Step 3: Train the Bot Using a Pre-defined Corpus
ChatterBot learns from question-answer pairs. For now, we’ll use a simple set of conversations. This will get your bot started.
training_data = [
"Hello",
"Hi there!",
"How are you?",
"I am doing well, thank you.",
"What is your name?",
"My name is SimpleBot. I am a chatbot.",
"Goodbye",
"It was nice talking to you!"
]

trainer.train(training_data)
ChatterBot also has larger corpora for more training. You can explore these later.
Step 4: Craft a Loop to Get and Print Responses
The chatbot’s heart is a loop that asks for input and responds. We’ll use a while loop that stops when the user types ‘quit’.
print("SimpleBot is ready to chat! Type 'quit' to exit.")

while True:
user_input = input("You: ")
if user_input.lower() == 'quit':
print("Goodbye!")
break

response = chatbot.get_response(user_input)
print(f"SimpleBot: {response}")
Step 5: Execute and Interact with Your First Chatbot
Save your file and run it with Python.
python simple_bot.pyStart chatting! Use greetings like “Hello” or “How are you?”. The bot will answer from your training. Try new questions. ChatterBot will learn and improve over time.
You’ve made a basic chatbot. For more complex tasks, you might use spaCy later. For now, enjoy your first chatbot.
Implementing Natural Language Understanding with NLTK
True conversational intelligence starts with processing human language. The Natural Language Toolkit (NLTK) is perfect for this task. It goes beyond basic chatbots by understanding the meaning and intent behind words. NLTK offers strong algorithms and data for this critical step.
This section will teach you about NLTK techniques for turning raw text into data your bot can use. You’ll learn to break down sentences, normalise vocabulary, and prepare for intent recognition.
Processing User Input with Tokenisation
The first step is to split text into manageable pieces called tokens. Tokenisation breaks down sentences into individual words or phrases. This helps your chatbot analyse each element.
NLTK’s word_tokenize function does this well. For example, “I’d like to book a flight to London tomorrow!” becomes: ['I', "'d", 'like', 'to', 'book', 'a', 'flight', 'to', 'London', 'tomorrow', '!']. It even splits contractions like “I’d” into “I” and “‘d”.
This detailed breakdown is key for analysis. Without it, your bot can’t find the main action or important details.
Reducing Words to Their Roots with Stemming and Lemmatisation
Words often change form. “Booking”, “booked”, and “books” all mean “book”. Normalising these variations makes your chatbot’s vocabulary simpler and improves matching.
NLTK offers two main methods: stemming and lemmatisation.
- Stemming cuts off word endings. For example, “booking” becomes “book”. It’s quick but can create non-words.
- Lemmatisation is more precise. It uses a dictionary to find the root of words. With WordNetLemmatizer, “better” becomes “good”. It’s more accurate but needs to know the word’s part of speech.
Removing stopwords is also crucial. These are common words like “the”, “is”, and “to” that add little meaning. NLTK has a list of stopwords to filter out, helping your bot focus on important words.
| Technique | NLTK Module | Primary Purpose | Example Input → Output |
|---|---|---|---|
| Tokenisation | nltk.word_tokenize | Split text into words/punctuation. | “He’s running fast!” → [‘He’, “‘s”, ‘running’, ‘fast’, ‘!’] |
| Stemming | nltk.PorterStemmer | Reduce word to its crude stem. | “running”, “runner”, “ran” → “run” |
| Lemmatisation | nltk.WordNetLemmatizer | Reduce word to its dictionary lemma. | “is”, “are”, “were” → “be” |
Creating a Simple Text Classifier
With tokens ready, you can start building intent recognition. A text classifier assigns a user’s input to a category, like “greeting” or “book_flight”. This is the core of NLU.
Here’s how to make a simple classifier with NLTK:
- Prepare Training Data: Make a list of example sentences with their intents.
- Extract Features: Turn each sentence into a feature set, showing which keywords are present.
- Train a Model: Use an algorithm like Naïve Bayes (
nltk.NaiveBayesClassifier) to learn patterns. - Classify New Input: Feed a processed user message into the model to guess its intent.
While useful, this method has its limits for complex conversations. For advanced assistants, developers often use frameworks like Rasa. But knowing NLTK basics is key for customising and debugging.
Learning tokenisation, normalisation, and basic classification with NLTK gives you the basics of NLU. These skills are essential for more advanced models, including those with Rasa or spaCy.
Enhancing Chatbot Intelligence with spaCy
While NLTK is great for studying, spaCy is better for making chatbots work in real life. It turns user input into data that shows meaning and context. With spaCy, your chatbot can figure out who and what someone is talking about, and how sentences work together.
Installing spaCy and Downloading a Language Model
Starting with spaCy is easy. You install it with pip, like any Python package. But its real power comes from its language models. These models know a lot about grammar, words, and how they relate.
After you install it, you need to get a model. For English, the en_core_web_sm model is a good choice. This one command downloads and links the model, giving your chatbot the basics it needs. Without a model, spaCy can’t do its advanced tasks.
Extracting Meaning with Named Entity Recognition
Named Entity Recognition, or NER, is a big deal for chatbots. It finds real-world things in text. spaCy can spot things like people, places, and dates.
For example, if someone says, “Book a meeting with Alex at Google in London next Monday,” a basic chatbot might struggle. But spaCy’s NER can quickly find:
- PERSON: Alex
- ORG: Google
- GPE: London
- DATE: next Monday
This info lets your chatbot act smartly, like booking a meeting or finding info without manual parsing.
Analysing Sentence Structure for Better Comprehension
Knowing how words in a sentence relate is key for understanding. spaCy’s dependency parsing breaks down sentences, showing who does what and how.
Take the sentence: “The quick developer built a clever chatbot.” spaCy sees more than just words. It knows “developer” is doing the action “built,” with “chatbot” as the result. It also knows “quick” and “clever” describe “developer” and “chatbot.”
This helps your chatbot tell the difference between “Book a flight to Paris” (where you are the subject) and “Did you book the flight?” (where the chatbot is the subject). This detail is crucial for keeping conversations clear and relevant.
| Library/Service | Primary Strength | NER & Parsing | Best For |
|---|---|---|---|
| spaCy | Fast, industrial-strength NLP pipelines | Built-in, highly accurate models | Production chatbots needing deep text understanding on-premise |
| NLTK | Educational flexibility & linguistic toolkit | Available but often requires more configuration | Learning NLP concepts and prototyping |
| OpenAI API | Advanced generative language capabilities | Contextual understanding via prompts | Chatbots requiring creative generation and broad knowledge |
Using spaCy’s NER and parsing, your chatbot goes from reacting to keywords to really understanding what’s being said. While the OpenAI API is great for creative responses, spaCy is better for structured tasks. Combining these makes your chatbot smarter and more responsive.
Developing a Learning Chatbot with Machine Learning
The journey from scripted chats to real conversations is key in making a learning chatbot. Unlike old chatbots, a smart machine learning chatbot learns from data to guess what users want. It can handle new questions and get better over time. This process has three main steps: getting ready the data, creating a model, and adding it to the chatbot.
Preparing Data for a Scikit-learn Classifier
Every good machine learning chatbot starts with good data. You begin with a JSON file that lists ‘intents’. Each intent, like ‘hello’ or ‘weather’, has examples of what users might say.
First, you need to clean the text. This means breaking sentences into words, removing common words, and making words simple. Tools like NLTK or spaCy help a lot with this. Your goal is to turn each cleaned sentence into numbers that the model can understand.
Then, you match each number set with an intent. This makes a dataset for your Scikit-learn classifier to learn from.
Training and Evaluating a Predictive Model
Now, you have your data ready. You split it into parts for training and testing. Scikit-learn has many text classification tools. A simple Logistic Regression is a good start. For more complex tasks, Random Forest or Support Vector Machine might be better.
Training means teaching the algorithm with your data. It learns to connect words to intents. After, you test it on new data to see how well it does.
Important metrics include:
- Accuracy: How often it guesses right.
- Precision & Recall: Important for specific intents, especially rare ones.
- F1 Score: A balanced score of precision and recall.
For more advanced learning, you can use Keras and TensorFlow. A simple neural network can understand language better. Saving the trained model is key for the next step.
Integrating the Model into Your Chatbot Logic
The last step is to add the model to your chatbot. Your code needs to load the model and label encoder. When a user types something, it’s cleaned and turned into numbers.
These numbers are used to guess the intent. Then, the chatbot picks a response from the intents dictionary.
This makes a loop: input → cleaning → prediction → response. The machine learning chatbot now understands users better, making chats feel more natural.
Remember, this model is the heart of your chatbot. You can make it even better by adding a confidence check. If it’s unsure, it can say “I don’t understand” and ask the user to try again.
Building a Contextual Assistant with the Rasa Framework
The Rasa framework helps you create smart assistants for complex conversations. It’s different from simple bots because it offers a full solution for chatbots. It separates understanding language and managing conversations into two parts.
This setup lets your bot remember and act on the whole conversation, not just one message.
To start, you use YAML files to set up your Rasa assistant. This makes it easy to see and change the bot’s logic. Let’s look at how to build your first contextual assistant.
Step 1: Installing Rasa and Initialising a Project
First, make sure you have Python and pip. It’s good to use a new virtual environment for your Rasa project. Then, install Rasa with pip.
In your terminal, run the install command. Move to your project folder. Start a new Rasa project with one command. This sets up your project with all the needed files and data.
Step 2: Defining Intents, Entities, and Responses in NLU
The NLU part deals with natural language processing. You teach it by adding examples in `nlu.yml. You need to define intents, entities, and responses.
- Intents are what the user wants, like saying hello or asking the weather.
- Entities are specific info in the message, like a city or date. Rasa uses these to fill “slots” for later.
- Responses are what your bot can say back, listed in `responses.yml.
In your YAML, list each intent with many example phrases. Mark entities in those examples. This training helps the NLU model understand new messages.
Step 3: Writing Conversation Stories for Core
While NLU gets the *what*, Core decides the *what next*. You train Core with conversation stories in `stories.yml. A story shows how the bot should respond in a real conversation.
It connects user intents and entities to bot actions or responses. This builds context. For example, after “I want to book a flight”, the bot might ask “Where are you flying to?”.
If the user says a city, the story tells the bot to remember it and ask for the departure date. Writing many stories teaches the bot to handle complex conversations.
Step 4: Training and Conversing with Your Rasa Bot
With your NLU data and stories ready, train the model. Run the Rasa training command from your project’s root. This command uses your YAML files to build the models and train the dialogue policy.
After training, start talking to your bot. Use the Rasa shell for a chat interface in your terminal. Type messages like a real user.
Your bot will understand your intent, find entities, and follow the stories to give contextual answers. This process turns static definitions into a dynamic, learning conversational agent.
Learning these steps is key to making smart assistants. They can handle tasks like customer support, booking, or personalized recommendations with true contextual awareness.
Connecting Your Chatbot to the Outside World
The real power of a chatbot comes when it can talk to live data and chat on popular channels. Moving from a local test to a real app is a big step in chatbot development. This step means linking to outside services, adding voice, and making it available for users.

Fetching Live Data from RESTful APIs
Modern chatbots need to share up-to-date info like weather, stock prices, or news. You can get this by using RESTful APIs. Python’s requests library is the best tool for this.
First, install the library with pip. Then, write a function to call an API, parse the JSON, and get the data your chatbot needs. Always handle errors for network problems or API limits.
APIs make your chatbot dynamic, giving real-time value.
To show this live data well, add a simple web page. Use Streamlit or Gradio to make interactive dashboards. Here, your chatbot’s API responses can be shown in a nice way.
Adding Voice Interfaces
Adding voice makes your chatbot more accessible and useful. You need two main things: speech-to-text (STT) and text-to-speech (TTS).
For STT, use SpeechRecognition to turn audio into text for your chatbot. For TTS, pyttsx3 or gTTS can make speech from your bot’s text.
The steps are:
- Catch audio from a mic.
- Turn it into text for your chatbot.
- Use TTS to make the text into speech.
This makes a full voice-activated assistant, a big step up in user experience.
Deploying to Cloud Platforms and Messaging Apps
To make your chatbot always available, deploy it to a cloud platform. This lets it handle many users at once. Cloud platforms offer different options for ease, cost, and control.
Use Docker to package your chatbot and its needs. This way, it works the same everywhere. Then, deploy it to services like AWS Elastic Beanstalk, Google Cloud Run, or Heroku.
To reach users where they are, connect your chatbot to messaging apps. Each app, like Facebook Messenger, Slack, or Telegram, has its own API and webhook system.
The table below compares key cloud deployment options for your Python chatbot:
| Platform | Primary Deployment Model | Key Advantage | Ideal For |
|---|---|---|---|
| AWS Lambda | Serverless Function | Cost-effective for sporadic traffic; automatic scaling. | Event-driven chatbots with variable usage. |
| Google Cloud Run | Managed Containers | Simplifies running Docker containers; integrates well with other Google services. | Teams already using Google Cloud infrastructure. |
| Heroku | Platform-as-a-Service (PaaS) | Extremely simple git-based deployment; minimal configuration. | Rapid prototyping and getting a MVP live quickly. |
| Microsoft Azure App Service | Web App Hosting | Deep integration with Microsoft tools and enterprise Active Directory. | Chatbots within business environments using Office 365. |
Choosing the right deployment strategy is key in the chatbot development cycle. It turns your code into a strong and growing service.
Testing, Debugging, and Improving Your Creation
Creating a top-notch Python chatbot is not just about coding. It’s about a cycle of checking and improving. After building your bot, focus on testing its actions, measuring its success, and using real data to make it smarter. This ongoing effort turns a simple script into a reliable chat assistant.
Designing Comprehensive Dialogue Tests
Before you release your chatbot, it needs thorough dialogue tests. Don’t just test simple greetings. Create scenarios that push its limits and logic.
Test its memory by asking questions and then asking again later. See how it handles context changes and unclear questions. This ensures it works well in real situations.
Simulate user mistakes, like typos, to check its error handling. Test its personality and tone for consistency. If it uses token-based APIs, test long conversations to manage tokens effectively. This helps find problems before users do.
Tracking Key Performance Metrics
Measuring your chatbot’s performance is key for improvement. Relying on feelings alone is not enough. You need specific metrics to see how well it works.
Important metrics include User Satisfaction (CSAT) from surveys and Conversation Completion Rate for goal achievement. The Fallback Rate shows when it fails to understand and uses a default response. These metrics help keep your AI healthy over time.
| Key Performance Metric | Definition | Primary Goal |
|---|---|---|
| User Satisfaction (CSAT) | The average score from user ratings (e.g., 1-5 stars) after a chat session. | Maximise score; aim for >4.0. |
| Conversation Completion Rate | The percentage of dialogues where the user’s intent is fully resolved by the bot. | Increase rate; reduce human handoffs. |
| Fallback Rate | The percentage of user messages where the bot triggers its “I didn’t understand” response. | Minimise rate; indicates NLU gaps. |
| Average Session Length | The mean number of message exchanges per conversation. | Context-dependent; optimise for efficiency. |
Iterative Development Based on User Feedback
User data is the best tool for making your chatbot better. View it as a living system that learns and grows. Analyse conversation logs to find patterns.
Look for common misunderstandings and topics it can’t handle. This feedback helps you add new training examples or intents. Many Python libraries and frameworks, like Rasa, have tools for reviewing and annotating conversations.
Set up a regular retraining schedule. Use logs to create new training data, retrain your NLU model, and redeploy the updated bot. This cycle—deploy, measure, learn, update—keeps your chatbot improving with each update.
Conclusion
Creating a chatbot in Python gives you useful skills for AI chat. You’ve learned from the basics to making, training, and using different bots.
This journey shows how powerful Python is for making smart systems. You’ve worked with libraries like ChatterBot, Rasa, NLTK, and spaCy. A step-by-step guide shows how your chatbot gets better with good training data and learning over time.
To make your chatbot useful, think about its purpose and how it talks. Good design is key. Learning about effective chatbot design helps you make a helpful AI assistant.
Next, you can try more complex models. Think about adding different ways to interact or making your AI for specific jobs in finance or support. The skills you’ve learned, like working with APIs and testing, are useful for these projects.
Python is a great tool for making your AI chat ideas real. Start with a clear goal, use the right data, and keep improving based on what users say. This experience is a great start to the world of smart automation.
FAQ
What exactly is a modern chatbot and what can it do for my business?
A modern chatbot is a software that talks like a human. It helps businesses by answering customer questions 24/7. It can also book appointments and give personal info.
Chatbots are great because they can handle simple questions. This lets humans focus on harder problems.
Why is Python considered the best language for building chatbots?
Python is top for chatbots because it’s easy to read and write. It has lots of libraries for NLP and machine learning. This makes building chatbots faster.
Python also has a big community. This means there’s lots of help and resources.
How do I decide between building a rule-based chatbot and an intelligent, learning-based one?
Choose based on what your chatbot needs to do. Rule-based chatbots are good for simple tasks like answering FAQs. They use set rules to answer questions.
For more complex tasks, like understanding natural language, you need a learning-based chatbot. These chatbots can handle more complex conversations.
What level of Python knowledge do I need to start building a chatbot?
You need to know the basics of Python. This includes variables, data structures, and functions. You also need to know how to install packages.
While you can learn advanced topics, knowing the basics is essential.
Which Python library should I choose for my first chatbot project?
For beginners, ChatterBot is a good choice. It’s simple and works well for basic chatbots. For more advanced tasks, NLTK and spaCy are good choices.
If you want a chatbot that can handle complex conversations, Rasa is a good option. For the latest in language models, OpenAI API or Hugging Face’s Transformers library are great.
Why is it so important to use a virtual environment for chatbot development?
Using a virtual environment is important. It keeps your project’s dependencies separate from your system. This prevents version conflicts and makes your project easy to deploy.
Can I build a functional chatbot without using machine learning?
Yes, you can. ChatterBot lets you create chatbots based on rules. These chatbots are good for simple tasks like answering FAQs. They’re a great way to start with chatbots.
What is the difference between NLTK and spaCy for NLP in chatbots?
Both NLTK and spaCy are important for NLP. NLTK is great for learning and research. It has lots of tools for NLP tasks.
spaCy is better for real-world use. It’s fast and accurate. It’s great for tasks like named entity recognition.
How does a machine learning chatbot actually “learn” to understand users?
A machine learning chatbot learns from examples. It’s trained on data with user goals and details. This lets it predict what the user wants.
When it gets a new message, it uses this training to decide how to respond.
What makes Rasa a “full-stack” framework compared to other libraries?
Rasa is more than just an NLP library. It has two main parts: Rasa NLU for understanding messages and Rasa Core for managing conversations. This lets you build complex chatbots.
These chatbots can remember user details and follow complex conversations.
How can I make my Python chatbot dynamic, for example, to provide live weather updates?
To make your chatbot dynamic, use APIs. You can write code to get live data from APIs. This lets your chatbot give users real-time information.
What are the best practices for testing and improving a chatbot after deployment?
Test your chatbot well. Use different scenarios to see how it handles things. After deployment, track how well it’s doing.
Look at how often it fails to understand users. Use this info to make it better. Keep improving it by learning from real conversations.

 By
By